KeePass Update: Reduce security risk due to CVE 2023-32784 and delete memory dumps
The latest KeePass update to version 2.54 has been released. This finally closes the vulnerability CVE 2023-32784, which could be used to read the master password from memory image files. An update alone is not enough to protect against this vulnerability, because there is still a significant risk .
Note: This is a translation – you are free to contribute corrections over the comments
This is mainly due to Windows and the files for hibernation and quick start as well as the files for the swap file, the minidumps and the memory image files for bluescreens. A memory image with the master password could still remain in all these files. Even deleting these files does not provide immediate protection, because the images could still remain available in free space.
Therefore, only one thing remains: all affected files must be deleted and the free space must be overwritten. Of course, this involves some effort, but with my instructions below, anyone should be able to do this.
Instructions: Prevent recovery of KeePass master password after update
Start cmd as administrator

Enter the command
powercfg -H offto disable hibernation and quick start.
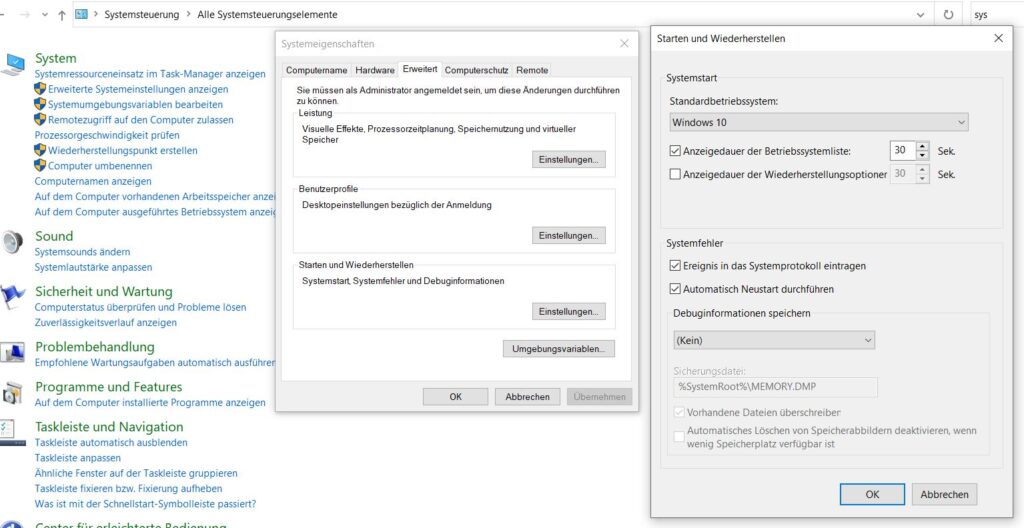
Disable hibernation under
Control Panel->System->Advanced System Settings->Startup and Restore->Settings
disable saving debug information – option: None

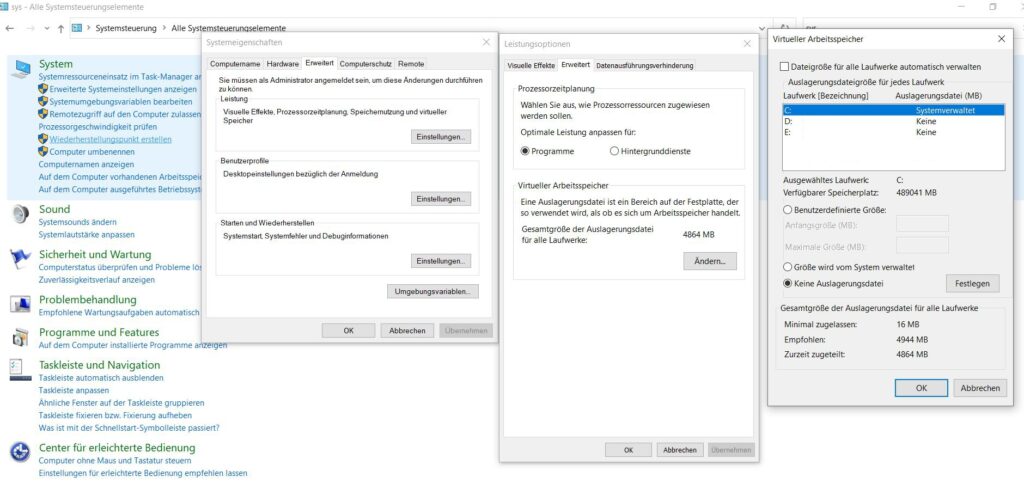
Disable under
Control Panel->System->Advanced System Settings->Performance->Settings->Advanced->Virtual Memory->Change
the swap file by selecting “No swap file” and “Set”.

Restart the computer with “restart”.
After restarting, check again if the swap file was actually completely disabled.
Start cmd as administrator

Execute the commands:
del %SystemRoot%MEMORY.DMPdel C:hiberfil.sysdel C:pagefile.sysIt should now be possible to delete the memory dump without an error message:

while the other two files are acknowledged with “could not be found”:

The other two files could not be found because we had disabled them before (see above). If another error message appears here you have not deactivated the files and restarted the PC – without a restart these files will not be deleted.
Now we open the path
C:Windows\Minidump
and delete all files in this folder.
Empty the recycle bin on the desktop.
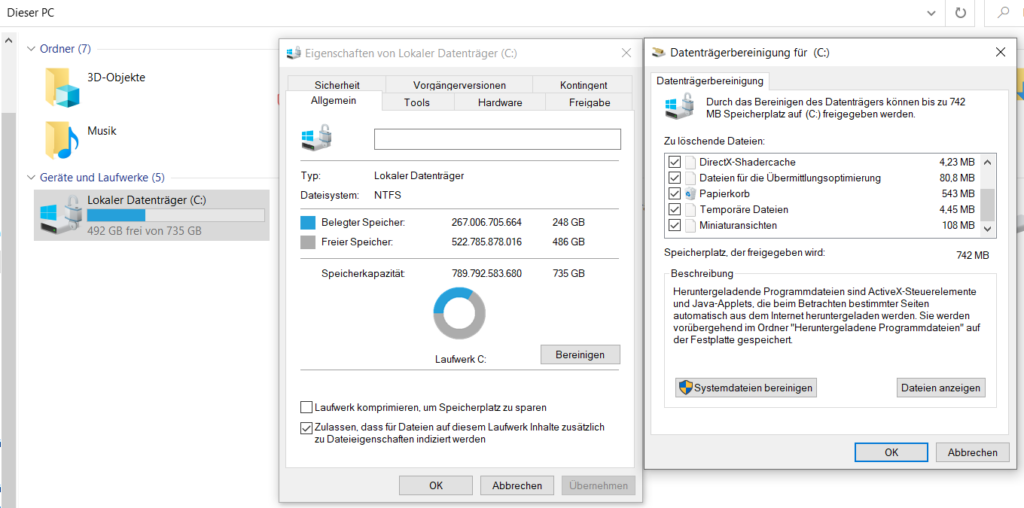
Run a disk cleanup under
This PC”->Right click on C->Properties->Cleanup
run. Select all available options.
After that, repeat the process and click on “Clean up system files” differently. Select everything here as well.

I remind again: Empty the recycle bin on the desktop as well.
Start cmd again as administrator

Overwrite all the free space with the following command:
cipher /w:C:
Wait until the process is complete (this may take several hours depending on the disk).
For best results, it is recommended not to use any other programs.
After that, activate Quick Start and Hibernate again with the command:
powercfg -H onRe-enable the swap file (see above) if you don’t currently have more than enough memory. If you don’t re-enable the swap file, you might run into problems if you don’t have enough RAM.
To do this, select under
Control Panel->System->Advanced System Settings->Performance->Settings->Advanced->Virtual Memory->Change
“Automatically manage file size for all drives”.

After that, you can restart the computer.
What is recommended to further secure KeePass and Windows?
In addition to a master password, use a keyfile
This is a file that sort of extends the password. The keyfile can provide additional protection, e.g. if the password is stolen by a keylogger.
Increase the iterations in KeePass
You can adjust the iterations in the database settings of KeePass (File->Database Settings->Security). As a guideline, I recommend a number of iterations that take about 10 seconds to complete. This will make brute force attacks (attacks where a large number of different passwords are tested) on your database file much more difficult.
Enable memory integrity
Enable “Memory Integrity” in Windows under Windows Security->Device Security->Core Isolation.