Install Microsoft SQL Server 2019 on Debian 11 (Example: Database for JTL-Wawi on Linux)
To install the Microsoft SQL server under Debian 11 we have to use some small tricks. However, the installation is quite possible.
If you have problems with the following steps – especially with securing the server – I can offer you my services at reasonable hourly rates (to the contact form).
This article contains protected areas which can be unlocked with a password for existing customers.
1. Install Microsoft SQL Server 2019 on Debian 11
First, we install some packages that we definitely need:
apt-get install -y gnupg
apt-get install -y gnupg2
apt-get install -y sudo
apt-get install -y curl
After that we add the key from Microsoft:
wget -qO- https://packages.microsoft.com/keys/microsoft.asc | sudo apt-key add -yThe warning can be ignored at this stage.
After that we need to add some Microsoft repos with
nano /etc/apt/sources.listwe add
deb https://packages.microsoft.com/ubuntu/20.04/mssql-server-2019 focal main
deb https://packages.microsoft.com/ubuntu/20.04/prod focal main
add
We update our repos and install the SQL Server
apt-get update
apt-get install -y mssql-server
/opt/mssql/bin/mssql-conf setup
We select the right version, accept the license and set a strong administrator password.
After the installation is completed, the corresponding service should run without any problems. This can be done with
systemctl status mssql-server --no-pagercan be controlled.
Note: TCP port 1433 is used for connections from outside.
Next we install some more tools
apt-get install -y mssql-tools unixodbc-devand download SQL Server Management Studio from https://docs.microsoft.com/de-de/sql/ssms/download-sql-server-management-studio-ssms?view=sql-server-ver15 on our Windows machine.
During the download we install fail2ban
apt-get install -y fail2banand add with
nano /etc/fail2ban/jail.confadd the following content
[mssqld]
enabled = true
logpath = /var/opt/mssql/log/errorlog
maxfailures = 10
findtime = 1200
bantime = 3600
filter = mssqld-auth
port = 1433
action = iptables-allports
backend=polling #!important
After that we create with
/etc/fail2ban/filter.d/mssqld-auth.confwe create a new file with the following content
[INCLUDES]
before = common.conf

[definition]
_daemon = mssqld
failregex = login failed for user .* [CLIENT: <HOST>]
ignoreregex =
and restart fail2ban
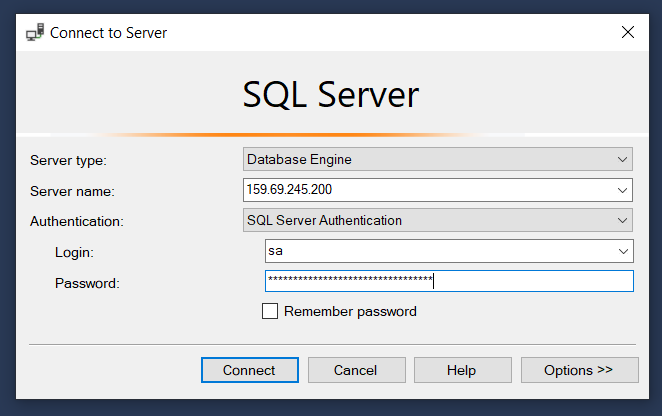
service fail2ban restartNow the installation file for SSMS should be downloaded. After installing the SSMS we start the Microsoft SQL Server Management Studio and connect using the IP address of our server, the username sa and the previously chosen admin password.
2. Create new database (for JTL-Wawi)
After that we can create a new database with a right click on Databases
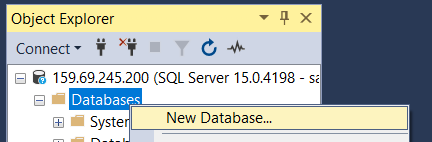

Here it is most important that the owner is “sa” and under options the collation is “Latin1_General_100_CI_AS” and the recovery model is “simple”.
It iseven easier if you simply install and start the JTL-Wawi or open the database administration of the JTL-Wawi.
Under server name we enter the corresponding IP address or hostname of the server:
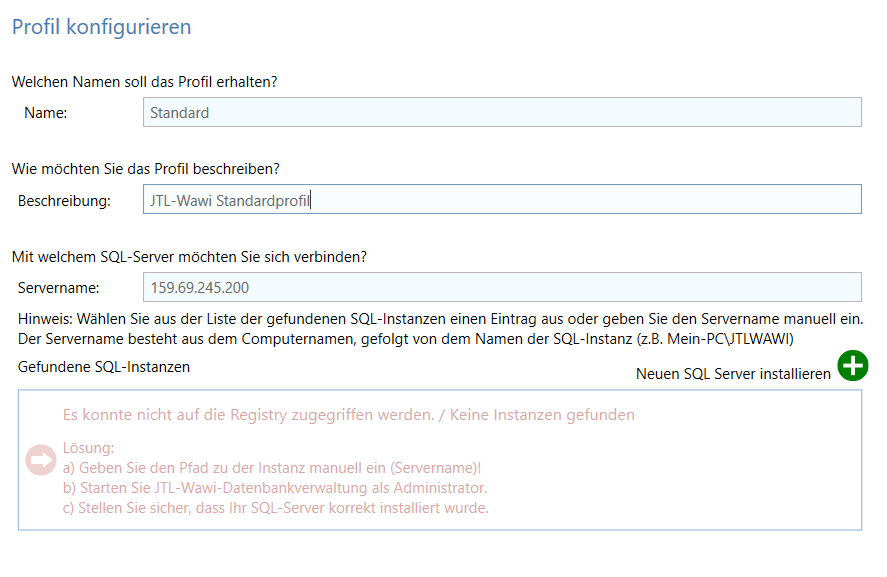

After that we click on “Next” and enter the admin password for the user sa and click on “Login” again.
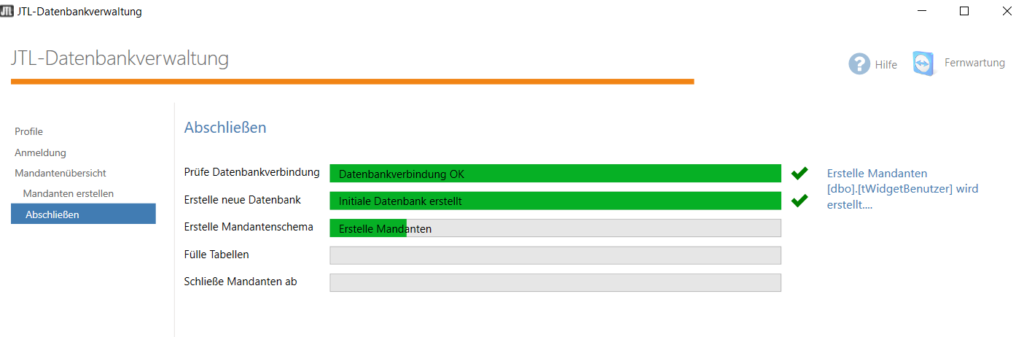
Next, we create a new client with the name eazy with “New client”
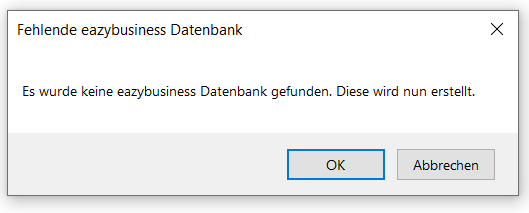
Thereupon we are informed that no eazybusiness database was found. We confirm the dialog with “OK”.

JTL-Wawi database management should now have created the database and created the appropriate tables in the database.

3. Create MSSQL backups under Debian 11
Backups can be created with sqlcmd under Debian 11, example:
/opt/mssql-tools/bin/sqlcmd -S localhost -U SA -P PASSWORD -Q "BACKUP DATABASE [eazybusiness] TO DISK = N'/var/opt/mssql/data/eazybusiness-$(date +%Y-%m-%d-%H-%M).bak' WITH NOFORMAT, NOINIT, NAME = 'eazybusiness', SKIP, NOREWIND, NOUNLOAD, STATS = 10" Restoring a backup would look like this:
/opt/mssql-tools/bin/sqlcmd -S localhost -U SA -P PASSWORT -Q "RESTORE DATABASE [eazybusiness] FROM DISK = N'/var/opt/mssql/data/eazybusiness-2022-04-18-12-51.bak' WITH FILE = 1, NOUNLOAD, REPLACE, NORECOVERY, STATS = 10"Which, however, is not without some additional commands:
4. Basic problem
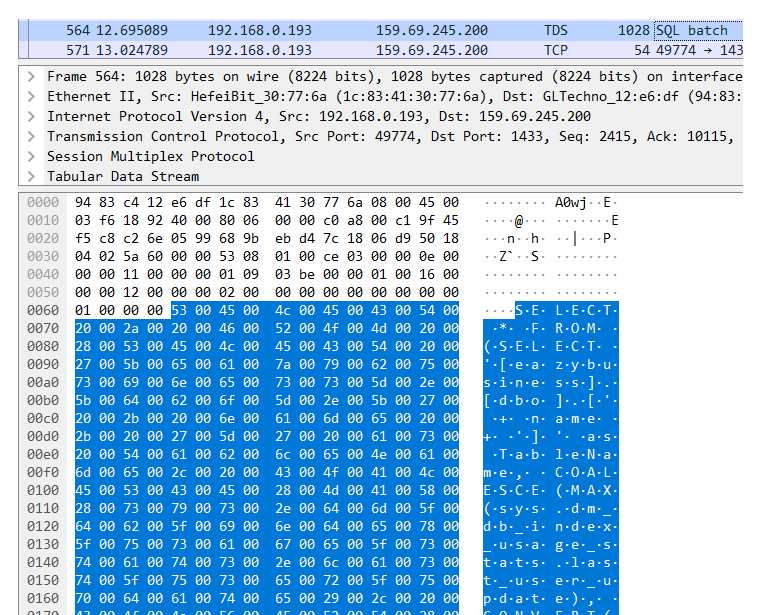
A fundamental problem is the default unencrypted transmission for SQL connections. In the following graphic we can clearly see that the data is transferred unencrypted:

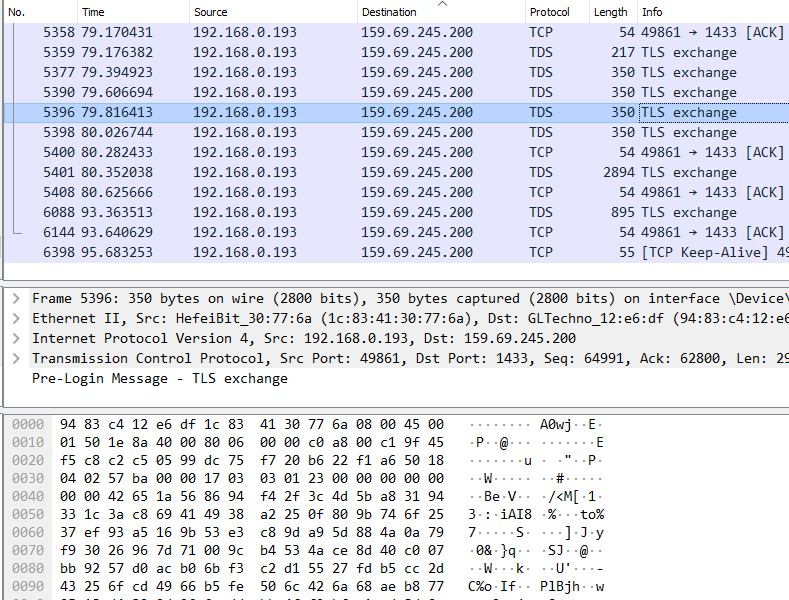
The solution to this is to set up an SSL certificate:
After that, the data will no longer be transmitted in plain text, but encrypted with TLS:

5. Server security
In this article we have already fixed some basic problems, but in this state the server is still not secured in the best possible way. Of course I’m happy to help you at reasonable hourly rates, it doesn’t matter if you use your JTL-Wawi-MSSQL-Server under Linux or Windows. You can reach me easily via my contact form.
This article is protected by copyright. I contradict among other things expressly the use in YouTube videos.